一,回顾
还记得我们在启动二讲过的嘛?container的启动和初始化讲完了,connector还没开始。下面,我们开始看connector是如何初始化和启动的。
二,再读Lifecycle
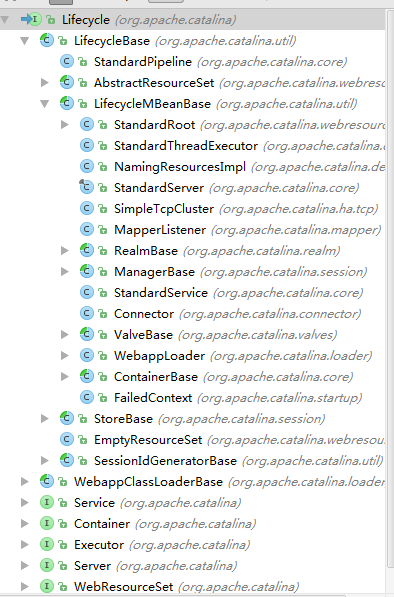
我们看Lifecycle的类层次图,发现很多类都实现了Lifecycle,包括connector和container,这里我只关心connector。由于Connector继承了LifecycleBase,跟container一样,当调用其init和start方法时,会调用其内部的initInternal和startInternal方法,下面我们就关注其方法。
三,Connector的initInternal
看方法:
protected void initInternal() throws LifecycleException {

    super.initInternal();

    // Initialize adapter
    adapter = new CoyoteAdapter(this);
    protocolHandler.setAdapter(adapter);

    try {
        protocolHandler.init();
    } catch (Exception e) {
        throw new LifecycleException
            (sm.getString
             ("coyoteConnector.protocolHandlerInitializationFailed"), e);
    }
}
这里我们要重点关注protocolHandler,它是怎么创建的呢?我们看Connector的创建。
3.1 创建Connector
在Catalian的createStartDigester()方法中,有这样一段代码:
Catalian
digester.addRule("Server/Service/Connector",
                     new ConnectorCreateRule());
我们看代码,这里创建了一个ConnectorCreateRule对象,到这个里面看看。
ConnectorCreateRule
public void begin(String namespace, String name, Attributes attributes)
throws Exception {
Service svc = (Service)digester.peek();
Executor ex = null;
if ( attributes.getValue(“executor”)!=null ) {
ex = svc.getExecutor(attributes.getValue(“executor”));
}
Connector con = new Connector(attributes.getValue(“protocol”));
if (ex != null) {
setExecutor(con, ex);
}
String sslImplementationName = attributes.getValue(“sslImplementationName”);
if (sslImplementationName != null) {
setSSLImplementationName(con, sslImplementationName);
}
digester.push(con);
}
中间有一句new Connector(attributes.getValue("protocol"));,好家伙,我们看看Connector的构造方法。
public Connector(String protocol) {
    setProtocol(protocol);
    // Instantiate protocol handler
    ProtocolHandler p = null;
    try {
        Class<?> clazz = Class.forName(protocolHandlerClassName);
        p = (ProtocolHandler) clazz.newInstance();
    } catch (Exception e) {
        log.error(sm.getString(
                "coyoteConnector.protocolHandlerInstantiationFailed"), e);
    } finally {
        this.protocolHandler = p;
    }

    ...//other
}
//默认类为Http11NioProtocol
protected String protocolHandlerClassName =
    "org.apache.coyote.http11.Http11NioProtocol";
我们看到,这里用反射创建了一个ProtocolHandler,默认为Http11NioProtocol,并且根据server.xml属性配置设置了协议。
3.2 Http11NioProtocol的init
我们看代码:
AbstractHttp11Protocol
public void init() throws Exception {
    for (UpgradeProtocol upgradeProtocol : upgradeProtocols) {
        configureUpgradeProtocol(upgradeProtocol);
    }

    super.init();
}
调用了父类的init
AbstractProtocol
public void init() throws Exception {
    if (oname == null) {
        // Component not pre-registered so register it
        oname = createObjectName();
        if (oname != null) {
            Registry.getRegistry(null, null).registerComponent(this, oname,
                null);
        }
    }

    if (this.domain != null) {
        try {
            tpOname = new ObjectName(domain + ":" +
                    "type=ThreadPool,name=" + getName());
            Registry.getRegistry(null, null).registerComponent(endpoint,
                    tpOname, null);
        } catch (Exception e) {
            getLog().error(sm.getString(
                    "abstractProtocolHandler.mbeanRegistrationFailed",
                    tpOname, getName()), e);
        }
        rgOname=new ObjectName(domain +
                ":type=GlobalRequestProcessor,name=" + getName());
        Registry.getRegistry(null, null).registerComponent(
                getHandler().getGlobal(), rgOname, null );
    }

    String endpointName = getName();
    endpoint.setName(endpointName.substring(1, endpointName.length()-1));

    try {
        endpoint.init();
    } catch (Exception ex) {
        getLog().error(sm.getString("abstractProtocolHandler.initError",
                getName()), ex);
        throw ex;
    }
}
AbstractEndpoint
public final void init() throws Exception {
    if (bindOnInit) {
        bind();
        bindState = BindState.BOUND_ON_INIT;
    }
}
先调用bind方法,绑定端口:
public void bind() throws Exception {

    serverSock = ServerSocketChannel.open();
    socketProperties.setProperties(serverSock.socket());
    InetSocketAddress addr = (getAddress()!=null?new InetSocketAddress(getAddress(),getPort()):new InetSocketAddress(getPort()));
    serverSock.socket().bind(addr,getBacklog());
    serverSock.configureBlocking(true); //mimic APR behavior
    serverSock.socket().setSoTimeout(getSocketProperties().getSoTimeout());

    // Initialize thread count defaults for acceptor, poller
    if (acceptorThreadCount == 0) {
        // FIXME: Doesn't seem to work that well with multiple accept threads
        acceptorThreadCount = 1;
    }
    if (pollerThreadCount <= 0) {
        //minimum one poller thread
        pollerThreadCount = 1;
    }
    stopLatch = new CountDownLatch(pollerThreadCount);

    // Initialize SSL if needed
    initialiseSsl();

    selectorPool.open();
}
四,Connector的startInternal
直接上方法:
protected void startInternal() throws LifecycleException {
    ...//检验
    setState(LifecycleState.STARTING);
    try {
        protocolHandler.start();
    } catch (Exception e) {
        throw new LifecycleException
            (errPrefix + " " + sm.getString
             ("coyoteConnector.protocolHandlerStartFailed"), e);
    }
}
方法很简单,调用了protocolHandler的start方法。
4.1 Http11NioProtocol的start
public void start() throws Exception {
    try {
        endpoint.start();
    } catch (Exception ex) {
        getLog().error(sm.getString("abstractProtocolHandler.startError",
                getName()), ex);
        throw ex;
    }
}
代码直接启动了endpoint,在Http11NioProtocol为NioEndpoint对象,这里就不解释了。
我们看其内部方法:
AbstractEndpoint
public final void start() throws Exception {
    if (bindState == BindState.UNBOUND) {
        bind();
        bindState = BindState.BOUND_ON_START;
    }
    startInternal();
}
代码采用Blocking模式接收连接请求。接着调用了startInternal方法:
public void startInternal() throws Exception {

    if (!running) {
        running = true;
        paused = false;

        processorCache = new SynchronizedStack<>(SynchronizedStack.DEFAULT_SIZE,
                socketProperties.getProcessorCache());
        eventCache = new SynchronizedStack<>(SynchronizedStack.DEFAULT_SIZE,
                        socketProperties.getEventCache());
        nioChannels = new SynchronizedStack<>(SynchronizedStack.DEFAULT_SIZE,
                socketProperties.getBufferPool());

        // Create worker collection
        if ( getExecutor() == null ) {
            createExecutor();
        }

        initializeConnectionLatch();

        // Start poller threads
        pollers = new Poller[getPollerThreadCount()];
        for (int i=0; i<pollers.length; i++) {
            pollers[i] = new Poller();
            Thread pollerThread = new Thread(pollers[i], getName() + "-ClientPoller-"+i);
            pollerThread.setPriority(threadPriority);
            pollerThread.setDaemon(true);
            pollerThread.start();
        }

        startAcceptorThreads();
    }
}
代码首先创建了线程池,然后初始化了最大连接限制,启动了poller线程,和acceptor线程。这样,整个流程就结束了。Poller主要作用于socket读写事件,Acceptor主要作用于接收请求。